Today I got to teach a demo for this fabric star ornament to the Houston Modern Quilt Guild.

I did a video tutorial, but because I didn’t caption it I wanted to accompany it with a picture tutorial to be as inclusive as I can be. So I’m not going to write a bunch of stuff you have to scroll through, onto the tutorial!
Materials:
- 4 strips total ( 4″x 16″ strips) – contrasting colors
- Starch
- Iron
- Embroidery Thread/String for hanging
- Self threading Needle
- Optional – Fabric Glue
- Optional – Clips
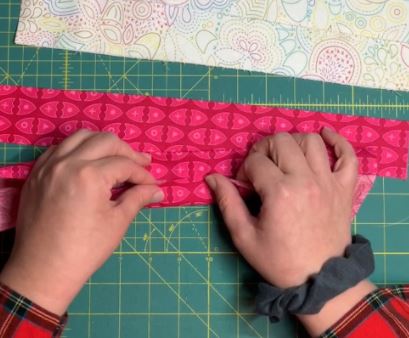
- Starch the strips very well. Press strips in half, and press the raw edges in to the pressed line. Fold in half again and press well. Similiar to making double fold bias binding tape.


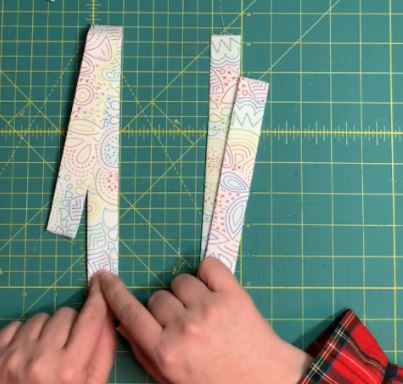
2. Fold each strip, leaving about 1.5″ longer on one side. Do this for all four strips.
3. Lay out the strips with the longer side tail on the mat/table. Take two strips of the same color and lay it vertically the strip on the left has a fold pointing up. The right strip has a fold pointing down.

4. Take the next two strips and lay them horizontally. The top strip has the fold on the left side. The lower strip has the fold to the right. Shown below.

5. Next up weaving, this part is fun 🙂 We are going to take the two tails on the upper left and slip them through the loop created by the fold pointed up.
Then the tails facing upwards will get slipped into the loop on top of it.
This continues until all the tails are tucked into a loop.
6. Gently pull all the tails to tighten the weave.
7. Flip the square over and now the longer tails are facing upward.

8. Fold the tail pointing upward down. Fold the tail pointing down upward. Your entire square should be covered in one color now.
9. Now it’s time for more weaving, take the long tail pointing to the right and go over the first strip and under the second strip. Repeat from left to right. The strip will go over the first strip and under the second.
10. Pull tightly and now you have two woven sides, and 8 tails. Two tails of each color in each direction.

11. Time to make some star points. Take the top left tail, the one that matches the square below it. White print to white print. Fold it into a 45 degree angle. Keep the fold and flip it completely over. Fold another 45 degree angle. Fold the triangle you’ve created in half.
12. Trim the tail length to be no longer than the square you are tucking it into. Then tuck it into the square. If you’d like to keep it secure you can clip it until you’re done.
13. Repeat this for the remaining 7 tails.
14. When you’re done you can use fabric glue to tack down all the tucks, and glue together the folds of the start point.

15. To add a hanging loop, I use a perle cotton and cut about 10″ length. I fold it in half tie a knot, and thread the loop onto a self threading needle.
16. Thread the needle through the center of the top (whichever side you want to be the top) and left the knot get buried in the middle. Then unthread the needle, and you have a loop!
Now enjoy this addicting beautiful ornament!
Happy Holidays to you and your family,
Tina 🙂


[…] joined the Houston MQG meeting in the morning, where Tina led us in making these cute fabric stars. Here’s her tutorial if you want to make one yourself — they are quick and easy, no sewing required, and can be […]